Showing posts with label caja. Show all posts

Friday, April 5, 2019

Cajitas de Pascua... Easter Boxes

Cuanto tiempo sin pasar por aqui!!! Tengo alguna que otra cosilla que compatir, pero voy a empezar por lo de hoy... un nuevo video en La Pareja Creativa!!! Pasad por alli para ver estas cajitas de Pascua en más detalle :-)

It's been a long time!!! I have a few things to share, but I'll start with the latest... a new video at La Pareja Creativa!!!
Go check it out if you want to see this cute Easter boxes in more detail :-)


Que tengais un buen fin de semana! Besitosss!

Have a lovely weekend! xx

Productos Utilizados:
Supplies:

Llega la Primavera Sellos
Comprar en:
LPC
Feliz 2 Sellos
Feliz 2 Sellos
Comprar en:
LPC
Interactivate
Interactivate
Comprar en:
LPC
Llega la Primavera Troqueles
Comprar en:
LPC
Neenah White Cardstock
Comprar en:
SSS
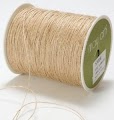
Natural Twine
Natural Twine
Comprar en:
SSS
Memento Black
Memento Black
Comprar en:
SSS
Set rotuladores Copic
Comprar en:
SSS
Cinta dimensional
Cinta dimensional
Comprar en:
KIM
Cinta Doble Cara
Cinta Doble Cara
Comprar en:
KIM
Foam Squares
Foam Squares
Comprar en:
SSS
Guillotine 6 inch
Guillotine 6 inch
Comprar en:
SSS
Mini Misti
Mini Misti
Comprar en:
SSS
Cuttlebug
Cuttlebug
Comprar en:
SSS

Wednesday, March 18, 2015

My turn at LPC... Mi turno en LPC

Hi everyone!
Today I'm over at La Pareja Creativa with a card and a box. As you might already know, tomorrow we celebrate Father's Day here, so I wanted to make something for that. I hope you have time to stop by and check it out! And if you are one of the lucky ones with a long weekend... Enjoy it!

Hola a todos!
Hoy me he pasado por La Pareja Creativa con una tarjeta y una cajita. Como ya sabreis, mañana celebramos el Dia del Padre por estos lares, asi que queria hacer algo para eso. Espero que tengais un ratito para pasaros a echarle un vistazo! Y si sois de los suertudos que teneis puente... ¡A disfrutarlo!
Thanks for stopping by! x

¡Gracias por pasaros por aqui! Un besito!

Thursday, November 20, 2014

Poinsetta die from LPC... Flor de Pascua de LPC

Hi everyone!
Yesterday I shared some projects at La Pareja Creativa using the Poinsetta die, so go check them out! That die has soooo many possibilities, I love it! Specially for shakers... super easy!
Here is a little sneak peek at what you can see over there ;-)

¡Hola a todos!
Ayer compartí unos trabajos en La Pareja Creativa utilizando nuestro troquel de la Flor de Pascua, asi que pasaros por alli, porfi! Este troquel tiene tantas posibilidades, me encanta! Especialmente para shakers... super faciles!
Aqui podeis ver un poquito de lo que os espera en el blog ;-)
And don't forget to play along with our challenge this month with all your Christmas projects!

Y no os olvideis que podeis participar en nuestro reto de este mes con todos vuestros trabajos navideños!
Thanks for stopping by! x

¡Gracias por pasaros por aqui! Un besito!

Thursday, April 3, 2014

LPC Boxes... Cajas para LPC

***If you are here for the ABNH blog hop, click HERE***
***Si estas aqui por el salto de blogs de ABNH, pincha AQUI***

So this morning I shared some boxes in the LPC blog. I thought it would be nice to make something different and the gift box punch board seemed like the way to go. Here are my boxes:

Esta mañana he compartido unas cajas en el blog de LPC. Pensé que estaría bien hacer algo diferente y la "Gift Box Punch Board" fue lo primero que me vino a la cabeza. Aquí estan mis cajas:
I had so much fun making these. That "TQM" (it means "I love you a lot" in Spanish) bubble die is perfect for cute projects or LOs. Here are some close ups of both boxes:

He disfrutado mucho haciendo estas cajas. El troquel de "TQM" (Te Quiero Mucho) viene genial para cualquier proyecto o LO divertido. Aquí os dejo otras fotitos de las cajas:
I used some acetate on the word bubble, so you can see the inside of the box, and to have a place to glue down the letters. 

He utilizado acetato , porque asi se puede ver lo que hay dentro de la caja, y para tener un lugar donde pegar las letras.

The tag is from another amazing die set from La Pareja Creativa. And what about that great sentiment? Perfect!

La etiqueta es de otro set de troqueles de La Pareja Creativa. Y que te parece esa frase? Perfecta!
I used one of the stamp sets to build backgrounds "Fondos para él". It was super easy to align the stamp to stamp all over the box.

He utilizado uno de los sellos del set "Fondos para él" para cubrir la caja. Fue super fácil alinear el sello para crear el fondo.
Now, don't forget to visit the blog to see what the rest of the team made, and tomorrow will be a great day at the La Pareja Creativa blog, so you don't wanna miss it ;-)
Thanks for stopping by!

Ahora, no te olvides de pasarte por el blog para ver lo que ha hecho el resto del equipo, y mañana va a ser un día genial en el blog de La Pareja Creativa, asi que no te lo puedes perder ;-)
Gracias por pasarte por aqui!
Wednesday, February 12, 2014

Another Valentine's Box... Otra caja de San Valentin

As promised, I have another Valentine's Day project for you today:
Como habia prometido, hoy traigo otro proyecto de San Valentin:
If you saw my post at ABNH yesterday, I made a box very similar to this one there. I just LOVE the gift box punch board!! Best tool ever! So I made a box using one of the cute papers from the latest Elle's Studio collection, then I die cut a heart out of one of the sides. I embossed the sentiment and the heart over glassine paper and glued it under the heart window and I added a die cut black heart frame around the sentiment. Isn't it a cute box? ;-)
Thanks for stopping by!
Si has visto mi entrada de ayer en ABNH, hice una caja muy parecida a esta. Estoy loquita con la tabla de hacer cajas de We R Memory Keepers!!! Es una de las mejores herramientas que he comprado en mucho tiempo! Asi que para esta caja he utilizado uno de los papeles tan monos de la ultima coleccion de Elle's Studio, y despues he troquelado un corazon de uno de los laterales. Estampe con embossing el sentimiento y los corazones en papel glassine, o papel de pergamino creo que se llama, y lo pegue por dentro de la ventanita de corazon. Y le añadi un marco en negro troquelado. A que es una caja muy mona? ;-)
Gracias por pasarte por aqui!
Supplies:

Back at ABNH... Otra vez en ABNH

Hi everyone!
I have some Valentine's Day projects over at ABNH, so go check it out!
Hola a todos!
Hoy he compartido unas cositas para San Valentin en ABNH, asi que pasate por alli! 

Thanks for stopping by!
Gracias por pasarte por aqui!

Tuesday, February 26, 2013

I'm back...He vuelto

Hi everyone!
Wow, it's been a while since I posted here on the blog, sorry about that. Last week I was really busy with some orders, that I will be sharing with you later this week. Apart from that I had to get everything ready for my first cardmaking workshop!!! It was so exciting!!
As I've already mentioned before, cardmaking is not big here, so I've never been to a class, cause there aren't any. Lately scrapbooking is taking off and there are some classes here and there. So a friend asked me if I would like to give a class, and I thought that it was a great idea! Everything I've learned about this hobby has been on the internet, with youtube tutorials or by taking the amazing Online Card Classes. So I made a couple of projects for the class, trying a couple of techniques, but not using many products, because some of the girls that were coming to the class had never heard of "cardmaking". It is more difficult than I thought, to give one of this classes without everybody having a trimmer, but I think they all had a good time and they seemed to really enjoy it and want to learn more (so maybe there are more workshops on my future!).
Here are the projects I showed in class:

Hola!
Vaya, llevo un tiempo sin poner nada en el blog, asi que ya siento tenerlo abandonado. La semana pasada estuve muy ocupada con algunos encargos que compartire en el blog a lo largo de esta semana. Ademas de esto, tenia que preparar todo para mi primer taller de tarjeteria!!! Que emocionante!!!
Como ya he mencionado antes en el blog, tarjeteria no tiene muchos seguidores por estos lares, asi que nunca he podido asistir a una clase, porque no hay ninguna. Ultimamente se ve un poco mas de scrapbooking y hay clases en algunos sitios. Asi que cuando una amiga me pregunto si me gustaria hacer un taller, pense que era una idea genial! Todo lo que he aprendido sobre este hobby ha sido a traves de internet, con tutoriales en Youtube o con las clases de Online Card Classes. Asi que prepare un par de proyectos para la clase, utilizando un par de tecnicas, pero sin utilizar muchos productos de golpe, porque algunas de las chicas que venian al taller, no conocian mucho de tarjeteria. 
Es mas complicado de lo que yo pensaba dar una de estas clases sin que la gente tenga aunque sea su propia cizalla, pero bueno, creo que todas pasaron un buen rato, lo disfrutaron y quieren aprender mas (¡asi que a lo mejor hay mas talleres en mi futuro!).
Aqui estan los projectos que prepare para la clase:
We started with a spinner card. I just wanted to show them that they can make a card just using scissors, paper and a few punches. This card took longer than I anticipated, but this was a learning expirience for me too. Next we made a little box:

Empezamos con una tarjeta "giratoria", el sol gira al moverse por el carril de la tarjeta. Queria enseñarles que es sencillo hacer una tarjeta con poco producto, unas tijeras, papeles y algun troquel. Esta tarjeta llevo mas tiempo del que tenia anticipado, pero a fin de cuentas esto tambien era una experiencia nueva para mi de la que tenia que aprender. Lo siguiente que hicimos fue una pequeña caja:
Showed them how to make the box using Michelle's tutorial over at A Blog Named Hero. Then we used lots of distress inks and they had a go at the Cuttlebug and the Big Shot.
And this was meant to be project number 3:

Les enseñe como hacer la caja utilizando el tutorial de Michelle en A Blog Named Hero hace un par de meses. Despues utilizamos las tintas distress y probaron los troqueles con la Cuttlebug y la Big Shot.
Y esta ultima, iba a ser el proyecto numero 3:
I wanted them to have a go at embossing, cause that is the best thing about cardmaking right? But we run out of time, so I showed them really quick how it works and how you can emboss resist to color an image. 
Now I know that next time I should start with embossing so they can all try it.
All in all, I think the class was good but I would love to hear any helpful tips you might have in the comments.
Thanks for stopping by!!

Queria que probaran el "embossing", porque es lo mejorcito de la tarjeteria, verdad? Pero se nos acabo el tiempo, asi que les hice una rapida demostracion de como funciona, y de como coloreas una imagen utilizando la tecnica del resistido con "embossing".
Ahora se que la proxima vez deberia empezar por el "embossing" y asi pueden probarlo todas. Con todo esto, creo que la clase estuvo bien pero me encantaria recibir cualquier tipo de sugerencia que pueda ayudarme para la siguiente, asi que dejamelo en los comentarios.
Gracias por pasarte por aqui!!

LinkWithin

Related Posts Plugin for WordPress, Blogger...