Bueno, aprovecho que Oli duerme para compartir mi tarjeta para el reto de Octubre de La Pareja Creativa, y como tengo mucho que explicar, no me enrollo más:
It's been a while since I've stopped by, and I haven't shared so many things here!!! I'm sorry about that, and I'll try to start sharing things soon, but I just don't have time for everything :-(
Well, now that Oli is still sleeping, I'll share my card for the October challenge at La Pareja Creativa, and as it's a long explanation, I'll get right to it:
El reto de este mes consiste en crear un trabajo o tarjeta ineractiva y yo me he decantado por una tarjeta shaker CON AGUA!!!! La verdad es que la he disfrutado muchisimo y os cuento un poco de como la he hecho.
Queria crear una "limonada" de esas monisimas que ves en las jarras tipo Pinterest, y el nuevo set de Frutas Deliciosas me venia que ni pintado ;-)
This time the challenge is creating an interactive card or project and I decided to make a shaker card WITH WATER!!!! I had so much fun making it and here is a little explanation.
I wanted to create one of those cute Pinterest lemonades in mason jars, and the new set "Frutas Deliciosas" was perfect for this ;-)
Para explicarlo de manera algo más sencilla, esta shaker esta formada por dos partes, una que es la parte que tiene el agua, y otra "shaker" que tiene las frutas y demás cositas.
Para crear la parte de agua he utilizado una bolsita de plastico (una de las que traen los sellos y troqueles) y reforcé los bordes con varias capas de celo para que no "goteara". Después llené esta bolsita con agua (en mi caso utilicé suero, por evitar que crezcan "bichitos", aunque no sé si cambia algo) y añadí unas gotas de colorante alimenticio amarillo para darle ese tono.
To explain it better, this shaker has two parts, one has the water, and the other contains the fruits and other bits. To create the water part I used a plastic bag and I inforced the edges with tape. I filled it with water and i added a few drops of yellow food coloring to give it a bit of color.
Una vez creada la bolsita de agua, la pegué con celo detras de un panel del que habia troquelado la jarra, y pasé a crear la parte shaker. Troquelé las frutas, bayas, estrellitas (mi idea es que fueran los "cubitos de hielo") y hojas de diferentes cartulinas y las coloqué entre dos acetatos que pegué con cinta dimensional.
Y esta parte shaker la pegué con celo detrás de la bolsita de agua. De esta forma, las dos partes se mueven de manera independiente.
Once the water part was ready, I attached it with tape behind a panel that had the jar die cut out, and onto the shaker part. I created the fruits, berries, stars (meant to be ice cubes) and leaves from different cardstocks and I placed themm between two pieces of acetate glued with foam dimensional.
Then I attached it with tape behind the water part, and this way both "shakers" move independently.
Añadí una tapa metalica del mismo set "Jarra llena de" con un cordel, y el mensaje con el banderin grande de "Etiqueta Abierta" y los sets "Dulce".
Y para enmarcar la jarrita, estampé algunos sellos del set "Frutas deliciosas" en los bordes de la tarjeta.
I added the metallic lid from the same set with a piece of string, and the sentiment using the sets "Etiqueta Abierta" and "Dulce".
To frame the jar, I stamped some of the fruits and leves from "Frutas deliciosas" over the card edges.
Espero haberme explicado bien y que hayais entendido el proceso, porque es mucho más sencillo de lo que parece y os abre un monton de posibilidades en el mundo de las tarjetas shaker.
Os esperamos en este reto tan divertido y pasaros por el blog a ver las demás maravillas interactivas que han preparado mis compañeras. Una entrada increible!!!!
Muchas gracias por pasaros por aqui hoy y que tengais una buena semana! Besitossss!
I hope I explained the process well enough, cause it was much easier that it looks and it opens a whole world of possibilities when it comes to shaker cards.
We hope you'll join us for this challenge and stop by the blog to see the amazind stuff the girls made. It's an incredible post!!!!
Thanks so much for stopping by and I hope you have a great week! xx
Productos Utilizados:
Supplies:
 Frutas Deliciosas Comprar en: LPC |
 Frutas Deliciosas Comprar en: LPC |
 Flores Navideñas Comprar en: LPC |
 Jarra llena de Comprar en: LPC |
 Noche Estrellada Comprar en: LPC |
 Dulce Comprar en: LPC |
 Etiqueta Abierta Comprar en: LPC |
 Dulce Comprar en: LPC |
 Distress cardstock Comprar en: SSS |
 Neenah White Cardstock Comprar en: SSS |
 Versafine Onyx Black Comprar en: SSS |
 Tacky glue Comprar en: SSS |
 Foam Squares Comprar en: SSS |
 Cuttlebug Comprar en: SSS |
 Mini Misti Comprar en: SSS |
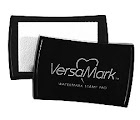 Versamark Comprar en: SSS |
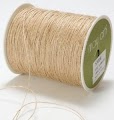 Natural Twine Comprar en: SSS |
 Metallics Paper Pad Comprar en: SSS |
 Acetate Comprar en: SSS |
 White Embossing Powder Comprar en: SSS |
 StazOn Black Comprar en: SSS |


Me encanta!!! Yo intenté hacer un fondo marino shaker con agua hace unos meses, pero mi proyecto nunca mejor dicho hizo aguas!!! Tengo pendiente repetir y buscar otra opción. Yo lo hice con la fuse y reforzando con celo, pero no funcionó...
ReplyDeleteTu limomanada es preciosa. Una gran tarjeta!!!
Besos ;)
With Car Rental 8 you can discover the cheapest car hires from over 50,000 international locations.
ReplyDeleteEs brutal Cris! Brutal!
ReplyDelete