Hi everyone!
I'm back today with another gradient card. In case you missed it, this week I'm sharing the cards I made for my challenge at 3flowers-retos de tarjetas, that didn't make the cut ;-) So here is card number 2:
¡Hola a todas!
Hoy estoy de vuelta con otra tarjeta con degradado. En caso de que no os hayais enterado, esta semana estoy compartiendo las tarjetas que hice para mi reto en 3flowers-retos de tarjetas, pero que no fueron las elegidas ;-) Asi que aqui va la tarjeta numero 2:
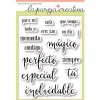
So for this one I created a pink gradient using Picked Raspberry distress ink as as watercolors with water. Once I had the gradient finished and dried, I stamped the word "Especial" using the same ink, but with first, second and third generation. And for the softer pink, I used Spun Sugar Distress ink.
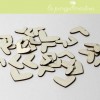
Then I added the die cuts, and the hearts from La Pareja Creativa. I covered them in white enamel accents, so they all had the same color and shine.
And I added the panel skew to a black card base.
Asi que para esta, he creado un gradiente rosa utilizando la tinta distress Picked Raspberry como acuarela con agua. Una vez me gustaba como estaba, lo dejé secar, y estampé la palabra "Especial" utilizando la misma tinta, pero en primera, segunda y tercera generacion (es decir, estampando sin volver a entintar 3 veces seguidas, para conseguir el degradado de color). Para los colores más claros, utilicé la tinta distress Spun Sugar.
Entonces añadí los troquelados y los corazones, que son de La Pareja Creativa. Los cubrí con el enamel accents blanco, para que tuvieran el mismo color y brillo.
Y para terminar, lo pegue torcido sobre una tarjeta negra.
This one was quite fast to make, I think the drying took the longest. I like how vibrant the pink is with the distress inks, and the contrast with the black and white.
So how are your gradient projects going? I hope you join us for the challenge:
No tardé mucho en hacer esta tarjeta, creo que lo que más tiempo me llevo fue que se secara. Me encanta lo llamativo que queda el rosa de las tintas distress de esta manera, y como contrasta con el blanco y el negro.
Asi que ahora os toca a vosotras, como van vuestras tarjetas con gradiente? Espero que nos acompañeis en el reto:
And with this one, I would be playing along with the Wednesday challenge at Simon Says Stamp too:
Y con esta tarjeta, tambien voy a participar en el reto de los miercoles de Simon Says Stamp:
Thanks for stopping by today, and I'll be back tomorrow with another card! x
¡Gracias por pasaros por aqui hoy, y estaré de vuelta mañana con otra tarjeta! Un besito!
Supplies:
Productos Utilizados:
So let's start with the week of gradient, as I told you last Friday, when I showed you the new challenge at 3flowers-retos de tarjetas ;-)
In case you missed it, I made a few gradient cards for the challenge, cause I wasn't sure what to go for, and now I get to share them all with you, so here is my card for today:
Aqui estoy con mi semana del degradado como os comenté el Viernes, cuando os enseñé el nuevo reto de 3flowers-retos de tarjetas ;-)
En caso de que os lo perdierais, hicé varias tarjetas con degradado para el reto, porque no tenía muy claro lo que quería hacer, asi que ahora tengo varias tarjetas para compartir, y aqui esta la de hoy:
I don't know if you remember this, but for the last Online Card Class, I made one of those customize ink pads, using distress reinkers, and I love the "ombre" look you get with it. And it's so easy!
So I stamped the two lines at the top and bottom of the card base. Then in another piece of white cardstock I stamped the sentiment and added it on top with a black mat.
As distress inks are not really created for stamping solid images, you get this drops in the stamp, that to me they look like water, or the sea with the foam, and I love it!
No se si os acordareis, pero para la ultima Online Card Class, me hice mi propio "DIY inkpad" , utilizando los reinkers de las tintas distress, y unas toallitas humedas, y como me encanta el efecto "ombre" que se consigue con el, pues lo he vuelto a usar. ¡Y es tan facil!
Asi que estampé dos rayas arriba y abajo en la base de la tarjeta. Despues, en otra cartulina blanca, estampé el mensaje y lo añadí con unos bordes negros a la tarjeta.
Como las tintas distress no estan diseñadas para estampar imagenes solidas, quedan esta especie de gotas en el sello, que da un efecto de agua, o de el mar con la espumilla de las olas (o a mi me lo parece) y me parece que queda super chulo!
I hope you decide to join us for the challenge at 3flowers-retos de tarjetas, and I'll be back tomorrow with another of my "ombre" cards ;-)
Espero que os animeis a participar en el reto en 3flowers-retos de tarjetas, y estaré de vuelta mañana con otra tarjeta efecto "ombre" ;-)
With this card I'll be participating in the current challenge at Simon Says Stamp Wednesday Challenge blog, that it's about Sentiments:
Con esta tarjeta voy a participar en el reto actual de los Miercoles de Simon Says Stamp, que va de Sentimientos:
Thanks for stopping by today! x
¡Gracias por pasaros por aqui! Un besito!
Supplies:
Productos Utilizados:
Today a new challenge begins at 3flowers-retos de tarjetas, and this time, it's MY challenge!!! When I had to choose one, I wasn't sure what to go for, and after talking a bit with Andrea, we had a clear winner: an "Ombre" card!!!
And that is the good thing about Andrea. I'm sure everyday she has a million crazy ideas that she wants to try with us, and she's always planning something new and interesting. But when you are a bit overwhelmed by it, she's always there to help you out and give you that little push that you need, and for this challenge, she helped me so much :-)
If you've been around here for a while, you probably already know that I love that gradient effect. So I was super excited to start with my card. But then... the pressure was ON. It was my challenge, and I was kind of freaking out, because none of the cards I was making were making me totally happy. So I made 5 cards. 5! And then I just sent one of them to Andrea and I will have to share the other ones next week, cause they still deserve some love, right?
So here is my "Ombre" card:
Hoy comienza nuevo reto en 3flowers-retos de tarjetas, y esta vez, es MI reto!!! Cuando me tocaba elegir tema, no lo tenia muy claro, pero despues de hablarlo con Andrea, teniamos un ganador seguro: el gradiente, degradado o efecto "Ombre", como lo querais llamar!!!
Y es que esto es lo bueno de Andrea. Estoy segura que a lo largo del dia, se le pasan un millon de ideas locas por la cabeza que le gustaria intentar, y siempre esta planeando cosas nuevas e interesantes. Pero cuando estas un poco agobiadilla, siempre esta ahi para echarte una mano y darte el empujon que necesitas. Y para este reto, me ayudo un monton :-)
Si habeis estado por mi blog desde hace tiempo, seguramente ya sabreis que el efecto degradado me chifla. Asi que estaba con tantas ganas de ponerme con la tarjeta. Pero una vez me puse... nada de lo que hacia me convencia, y es que es mi reto, asi que hay presion. Pues el caso es que terminé con 5 tarjetas. 5! Y terminé decidiendome por una de ellas para el reto, pero ni os imaginais lo que me costó! El resto las tendré que compartir por aqui la semana que viene, porque tambien se merecen un poquito de amor, verdad?
Pues aqui esta mi tarjeta "Ombre":
I decided to create a watercolor gradient for the sky and the waves :-) I started with a light blue coat all over the paper, and I dried it with my heat gun. Then I added the next color and dried it again, and like that with every single wave. Drying it everytime is what gives it that "wave" edge.
Then I stamped the ship, masking off one of the "waves" and I paper pieced it. To make it look like it was "in" the water, I cut along the wave and wedge it in there.
Me decidí a crear un degradado con acuarelas para crear el cielo y las olas :-) Comencé con una capa de azul muy clarito sobre todo el papel, y lo sequé con la pistola de calor. Despues añadí el siguiente color y lo sequé otra vez, y así con cada ola. Al secarlo entre capa y capa, se consigue ese borde que forma la "ola".
Entonces estampé el barco, enmascarando una de las olas y lo monte utilizando la tecnica del paper piecing. Para hacerle parecer dentro del agua, con un cutter corté a lo largo de la ola y "metí" el barco dentro.
As you can see, I used a "wood" print paper for the boat, I just couldn't stop myself ;-)
To finish the card, I die cut a circle out of the main image, stamped the sentiment and the seagulls, and adhered it to a white card base.
I hope you join us for the challenge, and I can't wait to see what you all create, cause I'm sure I'm gonna love them all!
Stop by the blog to see the super cool cards that the rest of the DT girls created:
Como podeis ver, he utilizado un papel decorado efecto "madera" para el barquito, y es que no me pude resistir ;-)
Para terminarla, troquelé un circulo con la imagen principal, estampé el mensaje y las gaviotas, y lo pegué en una tarjeta blanca.
Espero que os animeis a participar en el reto, y ya estoy deseando ver lo que creais, porque seguro que me van a encantar todas!
Y pasaros por el blog para ver la pasada de tarjetas que han creado las otras chicas del DT:
Thanks for stopping by today, have a great weekend, and I'll be back on Monday with more "Ombre" cards ;-)
¡Gracias por pasaros por aqui hoy! Que tengais un finde estupendo y nos vemos el lunes con mas tarjetas con degradado ;-) Un besito!
Supplies:
Productos Utilizados:
Yesterday I stopped by La Pareja Creativa with two watercolored cards. I wanted to use two different mediums to compare them; the one I use more often, that is watercoloring with distress inks, and a watercolor palette.
Stop by the blog to see the results and let me know which one is your favorite ;-) But here you can see a little bit of both projects:
Ayer me pasé por el blog de La Pareja Creativa con dos tarjetas utilizando acuarelas. Queria probar dos medios distintos para compararlos; el que utilizo mas habitualmente, que es tintas distress como acuarelas, y una paleta de las normalitas.
Pasaros por el blog para ver el resultado y contadme cual de las dos os gusta mas ;-) Pero aqui os voy dejando un pequeño adelanto de ambos trabajos:
Thanks for stopping by today! x
¡Muchas gracias por pasarte por aqui hoy! Un besito!
Today we start a new challenge at La Pareja Creativa! This time is a color challenge and this is my card:
Hoy comenzamos un nuevo reto en La Pareja Creativa! Esta vez se trata de un reto de color y esta es mi tarjeta:
You'll have to use at least 3 of the next colors, but I decided to challenge myself and use them all ;-)
Tendras que utilizar al menos 3 de estos colores, pero como era un reto, me propuse utilizarlos todos ;-)
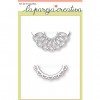
So I started by glueing small strips of papers in those colors together and I die cut the "siempre" out of it.
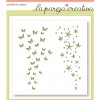
Then in a white piece of cardstock, using the stencil "Mariposas y Estrellas" I applied some Versamark, and then I covered it with Pearl Perfect Pearls powder for a subtle finish. I love that effect!
Asi que empecé pegando pequeñas tiras de papel en esos colores juntas y troquelé el "siempre" de ellas.
Entonces, en una cartulina blanca, utilizando el stencil "Mariposas y Estrellas" añadí Versamark, y lo cubrí con polvos Pearl de Perfect Pearls para darle un toque brillante. ¡Me encanta el efecto que se consigue!
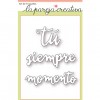
To use the colors again, I added them in the card base and the ink for the rest of the sentiment. I just love how the "Siempre" dies work with the "Especial" stamp set, so many possibilities!
And this month the "Siempre" set is the product of the month, so you can get it with a discount at the shop:
Para utilizar los colores otra vez, los añadí a la base de la tarjeta y en la tinta que utilice para el resto del mensaje. El set de troqueles "Siempre" combina tan bien con el set de sellos "Especial", tantas posibilidades!
Y este mes el set "Siempre" es nuestro producto del mes, asi que puedes conseguirlo con descuento en nuestra tienda:
I hope you join us for this fun challenge, and don't forget to stop by the blog and check out the projects from the rest of the DT:
Espero que nos acompañeis en este reto, y no os olvideis de pasar por el blog para ver las maravillas que han hecho el resto del DT:
Thanks for stopping by and have an amazing weekend! x
¡Gracias por pasaros por aqui y que tengais un finde genial! Un besito!
Supplies:
Productos Utilizados: