Hiyaaaa!
It's Thursday, so it's time for a new hop and a new card kit from SSS. And here is today's card:
¡Holaaaa!
Es Jueves, asi que es hora de un nuevo salto de blogs y un nuevo kit tarjetero de SSS. Y aqui esta mi tarjeta:
I wasn't sure about this kit when I saw it, but now I'm happy I got it! I looooove those preembossed papers and I want to use them all and keep them forever, so I'm not sure how I can do that ;-)
I started by die cutting that awesome star out of one of those papers, and then I inked over it with a few inks. From the kit I used the Festive Berries, but I decided to add yellow and orange instead of the blue one that comes in the kit.
Then I added a square of the wood paper. It's beautiful! And for the sentiment a piece of vellum with one of the messages from the stamp set.
No estaba muy segura de que me fuera a gustar el kit cuando lo vi, pero ahora me alegro de tenerlo! Estoy loquita por esos papeles que vienen con un preembossing, quiero utilizarlos todos y tenerlos para siempre, asi que no estoy segura como voy a conseguirlo ;-)
Comence troquelando el troquel de estrella tan chulo que viene en el kit de uno de esos papeles y despues le di color con unas cuantas tintas. Del kit he utilizado el Festive Berries, pero me decidí por amarillo y naranje en lugar del azul del kit.
Despues añadí un cuadrado del papel de madera que viene en el kit. Precioso! Y para el mensaje, una tira de vellum con uno de los sellos del kit.
I love how the card turned out and I think this might be one of my favorite kits for sure :-) Here is a picture of the complete kit, so you see all the cute products:
Me encanta como ha quedado la tarjeta y creo que este va a acabar siendo uno de mis kits favoritos :-) Aqui os dejo una foto del kit completo, para que veais todos los productos tan chulos que trae:
And this is a hop, so don't forget to check out what the other girls made, and today we have a new girl, so make sure you go give her a huge welcome!
Y esto es un salto de blogs, asi que no os olvideis de pasar por los blogs de mis compis para ver lo que os han preparado, además hoy tenemos chica nueva, asi que pasaros y darle una buena bienvenida!
And that's all for today! Thanks for stopping by! xx
¡Y esto es todo por hoy! Gracias por haberos pasado por aqui! Besitos!!
Supplies:
Productos Utilizados:
Today we start a new month and a new challenge at La Pareja Creativa!!!!
This time the theme is to make a "window" in your card, something that lets you see the inside of the card, or a shaker... And this is what I made:
Hoy comienza un nuevo mes y también un nuevo reto en La Pareja Creativa!!!!
Esta vez el tema es crear una "ventana" en tu tarjeta, algo que deje ver el interior, o por ejemplo una shaker... Y esto es lo que yo he hecho:
And here is a picture where you can see my "window" a bit better:
Y aqui esta la foto donde se puede ver mejor la "ventana":
As you can see I die cut a strip out of the front of my card that lets me see the inside and some of the elements of the card just float over it.
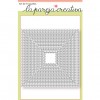
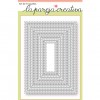
To cut that strip I used the "Rectangulos Cosidos A6" die, but just cutting part of it. Then I added a stip of acetate in the back so I could glue everything over the front.
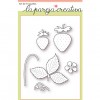
To make the leaves and stems, I used the "smooshing" technique over a watercolor panel, and then I die cut all the images. The strawberries I die cut out of fun foam and shaded a bit with a copic marker. The flowers are just white cardstock and I colored the center with another copic.
Como podeis ver, troquelé una franja del frente de la tarjeta que deja que se vea el interior, y asi algunos elementos "flotan" sobre ella.
Para troquelar la franja he utilizado uno de los "Rectangulos Cosidos A6", pero solo cortando parte. Despues añadí acetato por detras y fui pegando los troquelados sobre este.
Para las hojas y tallos, he utilizado la tecnica del "smooshing" en un papel de acuarela con tintas distress, y de ahi, las troquele todas. Las fresas son de goma eva y les dí un sombreado con un copic. Y las flores son simplemente de cartulina blanca y coloreé el centro.
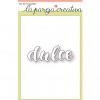
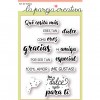
For the sentiment, I stamped part of it over the border, and then I used the "Dulce" die cut, that I colored to match the flowers with copics. I added it over the window so it floats over the front of the card.
We can't wait to see what "windows" you think of, and before I forget, you should know that this month we have 2 Products of the Month: the "Dulce" die, and the "Fresas" die set, and you can get them with a discount this month!!!!
So go check out what the rest of the girls made, and play along!
Para el mensaje, estampé parte de él encima del borde, y despues utilicé el troquel "Dulce", que coloreé para que quedará a juego con las flores utilizando copics. Lo añadí sobre la ventana de acetato para que pareciera que flota.
Nos morimos de ganas de ver qué "ventanas" se os ocurren, pero antes de que se me olvide, comentaros que este mes tenemos 2 Productos del Mes: el troquel "Dulce" y el set de troqueles "Fresas" que este mes tendran descuento en la tienda!!!!
Asi que pasaros a ver lo que han hecho mis compis y participad!
Thanks for stopping by! And have a great Monday! xx
Gracias por pasaros por aqui y que tengais un buen Lunes! Besitosss!
Supplies:
Productos Utilizados:
Hellooooo!
Today we have the last hop using the July card kit from SSS, and this time I wanted to use ALL of the papers from the kit:
¡Holaaaa!
Hoy saltamos por ultima vez con el kit de Julio de SSS, y esta vez me propuse utilizar TODOS los papeles que vienen en el kit:
I rarely use the papers that come in the kit, but this time I wanted to use them all, and just add a stamped message. So I cut strips of different widths and lengths from every paper and I made lots of different banners.
I glued them onto a white card base, but just on the right edge, so they fly up on the other edge. This gives the card lots of dimension!
Es muy raro que utilice los papeles que vienen en el kit, pero esta vez queria utilizarlos todos, y solamente tener que añadir un mensaje estampado. Asi que corté un monton de tiras de diferentes tamaños y grosores de cada papel para crear un monton de banderines.
Los fui pegando en una tarjeta blanca, pero solamente en uno de los bordes, asi se levantan por el otro lado. Esto le da mucha dimension!
I added the banner with the embossed sentiment, and then I run the card with a faux stitched die on that edge! Much faster than getting needle and thread ;-) Here is the picture of the full kit one more time:
He añadido un banderin con el mensaje embosado en blanco, y despues he pasado la tarjeta por la Cuttlebug con un troquel de falso cosido en el lateral derecho! Mucho mas rapido que con la aguja y el hilo ;-) Aqui os dejo una ultima vez la foto del kit al completo:
Now it's your turn to hop, so go check out what the other girls made:
Ahora te toca saltar, asi que pasate por el blog de mis compis para ver lo que han preparado:
That's all for today! Thanks for stopping by! xx
¡Esto es todo por hoy! Gracias por haberos pasado por aqui! Besitos!!
Supplies:
Productos Utilizados:
Hi everyone!
How is your summer going? Today I'm over at La Pareja Creativa with a card using the new ABCs dies that are amazing!!!! Go check it out :-)
Hola a todos!
Como llevais el veranito? Yo hoy me he pasado por La Pareja Creativa con una tarjeta utilizando los nuevos sets de troqueles ABCs que son increibles!!!! Así que echadle un vistazo ;-)
And remember that if you are gonna be making a card or something, you can still play along with the July challenge:
Y recordad que si vais a estar haciendo algo de scrap, aun estais a tiempo de participar en el reto de Julio:
Thanks for stopping by and have a great day! xx
¡Gracias por pasaros por aqui y que tengais un dia genial! Besitosss!
Supplies:
Productos Utilizados:
Hellooooo!
Today I'm back with another blog hop using this month's card kit from SSS. This time I didn't have a lot of time to make my card, but this is what I made:
¡Holaaaa!
Hoy estoy de vuelta con otro salto de blogs utilizando el nuevo kit del mes de SSS. Esta vez no tenia mucho tiempo para hacer mi tarjeta, pero esto es lo que he hecho:
I took one of the dark cardstocks from the kit and embossed the flower and leaves from the stamp set. I decided to give some "color" to the flowers with a white pencil. Then I cut that panel following the silhouette of the images.
I glued one of the papers from the kit on a white card base and stamped the sentiment from the kit. Then I added the embossed flowers with a bit of dimension.
Utilizando una de las cartulinas del kit, embosé la flor y las hojas del set de sellos del kit. Les di algo de "color" a las flores con un lapicero blanco. Despues recorte el panel siguiendo la silueta de las imagenes.
Sobre una base de tarjeta pegué uno de los papeles del kit y estampé uno de los mensajes. Despues añadí el panel con algo de dimension.
I like the delicate look of this card without being too complicated or taking too long to make ;-) And here is a picture of the full kit, so you see all the materials:
Me gusta el look delicado de esta tarjeta sin ser nada complicada o llevar mucho tiempo el hacerla ;-) Y aqui os dejo la foto del kit completo, para que veais todo lo que viene:
Now it's your turn to hop, so go check out what the other girls made:
Ahora te toca saltar, asi que pasate por el blog de mis compis para ver lo que han preparado:
That's all for today! Thanks for stopping by! xx
¡Esto es todo por hoy! Gracias por haberos pasado por aqui! Besitos!!
Supplies:
Productos Utilizados: