Friday, April 11, 2014

Let's play Bingo... A jugar al Bingo

We are starting challenge #33 at 3flowers-retos de tarjetas, and with this one, Andrea made me try new things and have green fingers for a couple of days. But it was a lot of fun! LOL! Here is my card:

Ya estamos en el reto 33 de 3flowers-retos de tarjetas, y con éste, Andrea ha conseguido que experimente y acabe con los dedos verdes un par de dias. Pero y lo bien que me lo he pasado, eh? jeje. Aquí va mi tarjeta:
For this challenge you have to choose one line of the bingo card, and use those three things in your card. I used Sew, Mix Media and Button.

Este reto consiste en elegir una linea del carton de bingo y utilizar esas tres cosas en tu tarjeta. Yo me quedé con Coser, Mix Media y Botón.
I started with watercolor paper and Dylusions sprays, and I mixed them on the paper until I was happy with the result. I used paper to remove some of the green color, so you could see the vibrant yellow a bit better, and I dried it with the heat gun.
Using the "Mini Cubist" Stencil, I sprayed some water and removed the color using paper. Here you can see it a bit better:

Empecé con papel de acuarela y los Dylusions sprays, y los fuí mezclando en el papel hasta que me gusto el resultado. Lo genial de estos sprays, es que los colores se mezclan perfectamente, y puedes quitar color utilizando papel de cocina. Así que quité un poco de verde, para que se viera el amarillo, y lo sequé con la pistola de calor. 
Utilizando un stencil (plantilla) de cuadritos, añadí un poco de agua, y quité el color con papel. Aquí se puede ver un poco mejor:
You can see that I used Picket Fence distress stain on some of the borders too.
I wanted to add some washi, and I finally used the one from Tim Holtz that has been sitting in a drawer for the past year.
Using the "Mini Art" stencil and white embossing paste that I colored with some "Vibrant Turquoise" dylusion spray, I added the raised words on the corners.

También puedes ver que añadí Distress Stain en Picket Fence en algunos bordes.
Quería añadir alguna cinta washi, y por fin he usado la de Tim Holtz que llevaba en el cajón desde el año pasado.
Utilizando la plantilla "Mini Art" y pasta de embossing blanca mezclada con unas gotas de spray Dylusion en "Vibrant Turquoise", añadí las palabras en relieve en las dos esquinas:

For the other corner, using the "Bubbles" stencil and distress stains "walnut stain" and "picket fence" I added the brown dots. I dried it, placed the stencil again and added some white embossing paste over it. I love how the paste picks up color from whatever ink is underneath, so it changes color:

Para la otra esquina, utilizando la plantilla "Bubbles" de Tim Holtz y Distress Stain en "walnut stain" y "picket fence" añadí los puntos marrones. Despues volví a colocar la plantilla y con pasta de embossing blanca añadí los puntos en relieve. Lo que me encanta de esta pasta, es que si la pones encima de las tintas y sprays que he utilizado, cambia al color que tenga debajo, por lo que los puntos van cambiando de color:
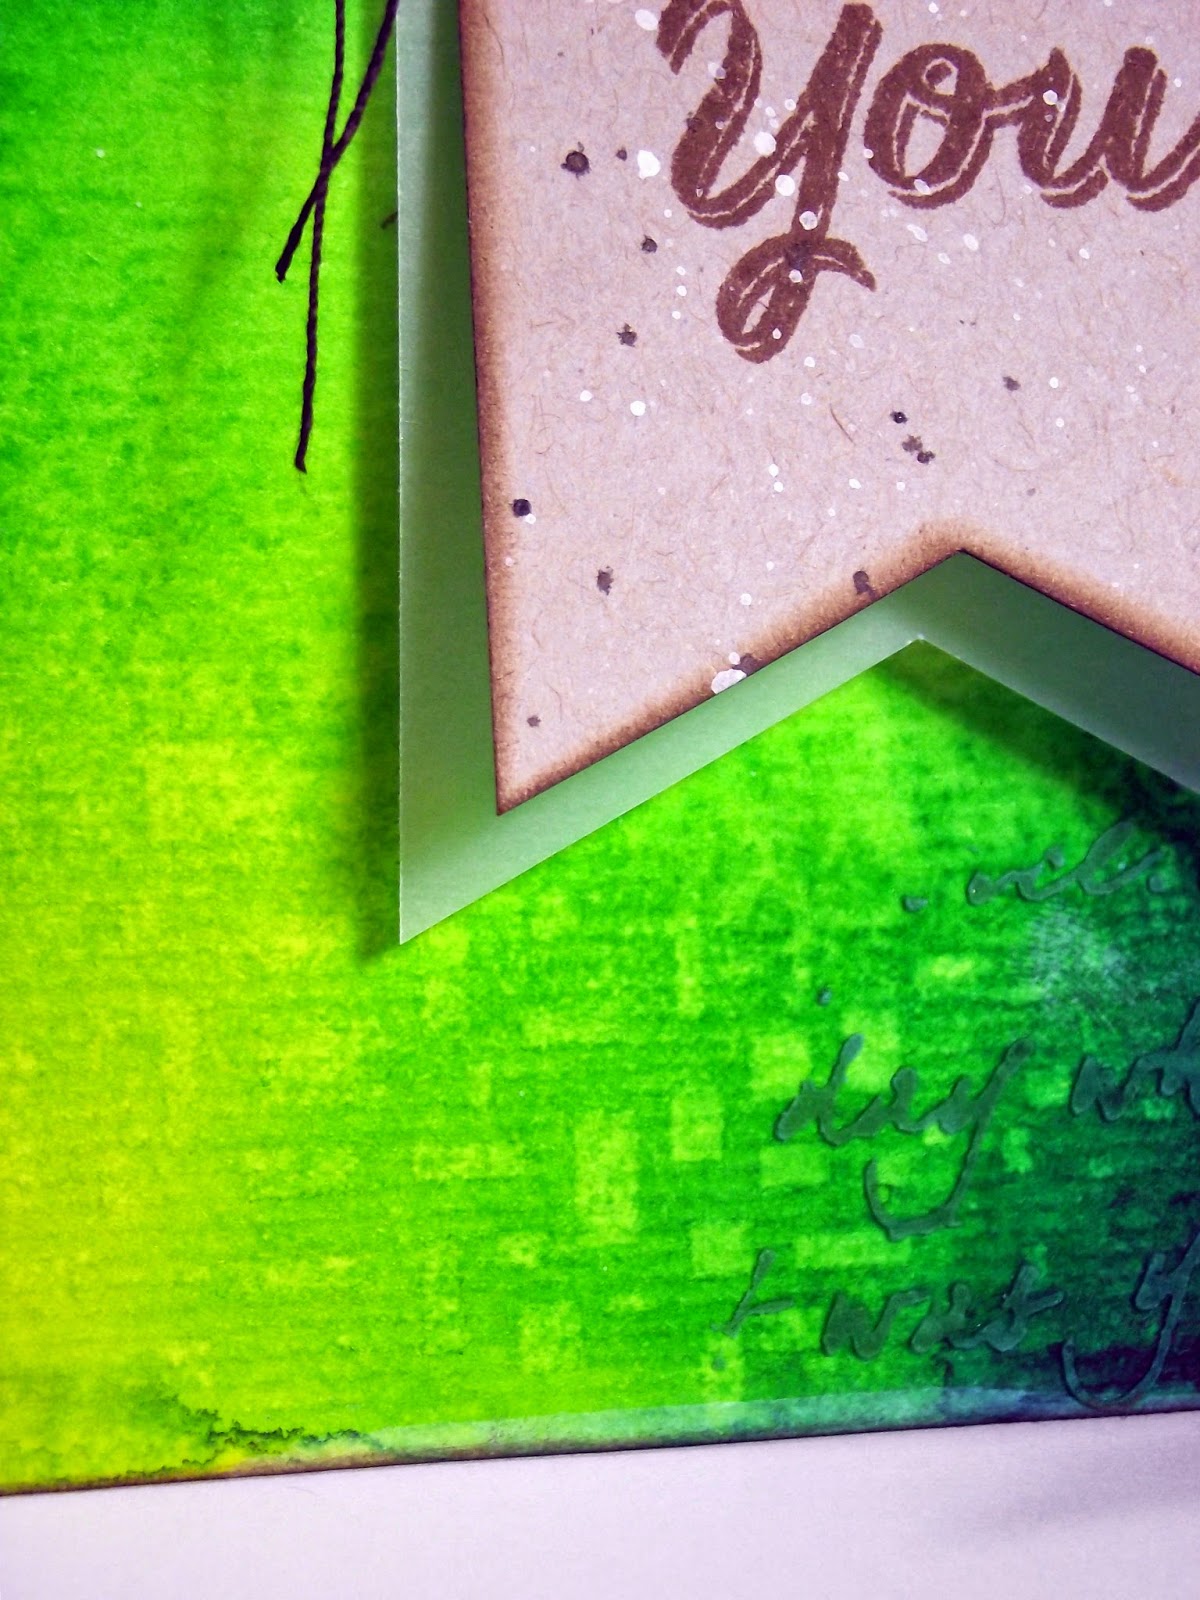
And once the mix media panel was finished, I made a banner with Kraft paper. Stamped the "Thank you", with a brush, I added some white and brown splatters, and I distressed the edges with "gathered twigs" distress ink.
I cut a banner from vellum slightly bigger than the first one, and I sewed them onto the mix media panel, adding a brown button.

Buff! That was a long explanation! If you made it all the way to the end of this post, you are a true champion, because this mix media projects have many steps and it takes ages to explain them all. I hope you liked the card and you get some time to play along with the challenge. And don't forget to stop by the blog, because the rest of the DT made some incredible cards for you.

Y despues de terminar el panel de mix media, creé el banderín con papel kraft. Estampé el "Thank You", con un pincel añadí salpicaduras en blanco y marrón y con tinta distress en "gathered twigs" coloreé los bordes. 
Corté otro banderin en vellum un poco más grande, y los cosí al panel mix media, añadiendo un botón marrón. 

Buff! ¡Cuantas explicaciones! Si has llegado hasta aquí, eres toda una campeona, porque es que esto del mix media tiene tantos pasos, que lleva un buen rato explicarlo todo. Espero que te haya gustado y que te animes a participar en el nuevo reto. Y pasaté por el blog, que el resto de las chicas han hecho unas pedazo tarjetas increibles.
Thanks for stopping by!

¡Gracias por pasarte por aqui!

Supplies:

Friday, April 4, 2014

First challenge from LPC... Primer reto de LPC

Today it's the beginning of our first challenge at La Pareja Creativa, and I hope you all find some time to play along with us.

Hoy hemos estrenado reto en La Pareja Creativa, y espero que todos os animeis a participar.
As it is our first challenge, the theme is pretty easy, "Inspired by..." and what Tina wants, is for you to play along with any kind of project (card, LO, Smash, PL,...) that was inspired by any of the projects the DT girls presented this past week. So go by the blog, or you have an album on our FB page with all our projects, choose one that you like and start creating.
And in case you didn't have enough with all of those, today we brought you new ones, and here is my card:

Por ser el primero el tema es muy sencillito, "Inspirado por..." y lo que Tina pide esta vez, es que presenteis cualquier trabajo (tarjeta, LO, Smash, project life, art journal,...)que esté inspirado en alguno de los trabajos que las chicas del DT hemos presentado esta semana. Asi que pasaros por el blog, o teneis todas las fotos en un album de nuestra página de FB, elegid una foto y a crear.
Y por si acaso no os llegaba con todo lo que ya os habiamos presentado, hoy hemos añadido cositas nuevas, y aqui os dejo la mía:
I love that flower die, and I wanted to use the "inlay die cuts" technique. So I first cut the flower out of the black cardstock, and out of some neon pink cardstock too. Behind the black panel I added a piece of paper covered with glue, and I started glueing down the pink petals in the correct place. Then I placed the "hola" word die cut where I wanted it, and I ran it throught my machine. I cut the "hola" out of pool cardstock too, and I placed it in the correct place on the black panel. Here is a close up:

Me encanta este troquel de la flor en la esquina, y queria utilizar con el la tecnica del "puzzle" de troqueles (o bueno, así lo traduzco yo) Primero corte la flor de la cartulina negra y de una cartulina rosa fluor. A la cartulina negra le puse un trozo de papel con pegamento justo detras de la flor, y fuí pegando cada petalo rosa en su sitio. Entonces coloqué el troquel de "hola" donde lo quería, y lo corté. Y también lo corté de una cartulina turquesa. Y de nuevo, como si fuera un puzzle, añadí el "hola" en su lugar correspondiente. Aquí tienes una foto más de cerca:
So stop by the blog to see the amazing things that the DT made for you, have a look at the challenge details (you have all month to play along) and don't forget about the giveaway that finishes on Monday. You still have time to comment, subscribe, hit that "like" button,...
Thanks for stopping by!

Pues pasate por el blog para ver el resto de preciosidades que han creado las chicas, echale un ojo a nuestro reto (tienes todo el mes para participar) y no te olvides que el sorteo termina el Lunes, asi que aún tienes tiempo de comentar, apuntarte, darle al "me gusta",...
Muchisimas gracias por pasarte por aquí!

Thursday, April 3, 2014

LPC Boxes... Cajas para LPC

***If you are here for the ABNH blog hop, click HERE***
***Si estas aqui por el salto de blogs de ABNH, pincha AQUI***

So this morning I shared some boxes in the LPC blog. I thought it would be nice to make something different and the gift box punch board seemed like the way to go. Here are my boxes:

Esta mañana he compartido unas cajas en el blog de LPC. Pensé que estaría bien hacer algo diferente y la "Gift Box Punch Board" fue lo primero que me vino a la cabeza. Aquí estan mis cajas:
I had so much fun making these. That "TQM" (it means "I love you a lot" in Spanish) bubble die is perfect for cute projects or LOs. Here are some close ups of both boxes:

He disfrutado mucho haciendo estas cajas. El troquel de "TQM" (Te Quiero Mucho) viene genial para cualquier proyecto o LO divertido. Aquí os dejo otras fotitos de las cajas:
I used some acetate on the word bubble, so you can see the inside of the box, and to have a place to glue down the letters. 

He utilizado acetato , porque asi se puede ver lo que hay dentro de la caja, y para tener un lugar donde pegar las letras.

The tag is from another amazing die set from La Pareja Creativa. And what about that great sentiment? Perfect!

La etiqueta es de otro set de troqueles de La Pareja Creativa. Y que te parece esa frase? Perfecta!
I used one of the stamp sets to build backgrounds "Fondos para él". It was super easy to align the stamp to stamp all over the box.

He utilizado uno de los sellos del set "Fondos para él" para cubrir la caja. Fue super fácil alinear el sello para crear el fondo.
Now, don't forget to visit the blog to see what the rest of the team made, and tomorrow will be a great day at the La Pareja Creativa blog, so you don't wanna miss it ;-)
Thanks for stopping by!

Ahora, no te olvides de pasarte por el blog para ver lo que ha hecho el resto del equipo, y mañana va a ser un día genial en el blog de La Pareja Creativa, asi que no te lo puedes perder ;-)
Gracias por pasarte por aqui!

Wednesday, April 2, 2014

Another LPC Card... Otra tarjeta con LPC

***If you are here for the ABNH blog hop, click HERE***
***Si estas aqui por el salto de blogs de ABNH, pincha AQUI***

Hi everyone!
This morning we continued the release week at La Pareja Creativa, but I waited to post it here, cause I wanted to leave the ABNH hop post for a little longer there, to make it easier for everyone. And now, I can share the card with you all, here:

Hola a todos!
Esta mañana hemos seguido con los estrenos en La Pareja Creativa, pero he esperado a publicarlo aqui, porque quería dejar el salto de ABNH más tiempo el primero, para hacerselo más facil a la gente. Y ahora, me toca compartir la tarjeta con vosotros, aqui:
I covered a piece of white cardstock with the flower stamps and the leaves. Then I cut the borders and the word die from it. I cut the borders out of a piece of red cardstock and adhered them to the back of the flower panel. Then I mounted it over a card with foam dimensionals. 
I love the stitching lines in the border dies, and what about that amazing word die? It's perfect!
Now, I'll be back tomorrow (well, in a couple of hours) with another LPC project, but stop by the blog, cause remember there is an amazing giveaway!!!!
Thanks for stopping by!

Estampe una cartulina blanca con los sellos de flores y hojas. La corte utilizando los troqueles de bordes, y corte con el troquel de palabra el "felicidades". Corté los bordes en una cartulina roja y los pegué por detras del panel de flores. Utilizando cinta dimensional lo añadi a una tarjeta blanca.
Me encantan las rayitas de cosido en los troqueles de borde, y que me dices del troquel de felicidades? Es perfecto!
Y bueno, eso es todo hasta mañana (bueno, dentro de unas horas) que volveré con otro proyecto para La Pareja Creativa, pero no te olvides de visitar el blog, porque recuerda que hay un pedazo sorteo!!!
Gracias por pasarte por aqui!
Supplies:

Tuesday, April 1, 2014

Happy Birthday ABNH... Feliz Cumpleaños ABNH

***If you are here for day 1 of La Pareja Creativa release, click HERE***
***Si estas aqui por el dia 1 del lanzamiento de La Pareja Creativa, pincha AQUI***

I'm back today with a very special post, cause today, ABNH is TWO!! And to celebrate it we have a blog hop with some incredible cardmakers.

Y aqui estoy de vuelta con un post especial, ya que hoy ABNH cumple 2 años!!! Y para celebrarlo, tenemos un salto de blogs con unas tarjeteras de morirse.
You should have arrived here from Jennifer McGuire's blog (What???? I know, I'm way too excited about this), but if you want to start from the beginning, or you get lost along the way, just pop over to ABNH where you can see the full list of participants. And here is my card:

Deberías haber venido del blog de Jennifer McGuire (Comoooo??? Lo sé, estoy demasiado emocionada por esto), pero si quieres empezar desde el principio, o te pierdes por el camino, pasate por ABNH donde esta la lista completa de participantes. Y aqui os dejo mi tarjeta:
I use the "iron off" technique to create the sentiment panel. I clear embossed the birthday blackboard from Hero Arts, colored each word a different color with markers and using an iron, removed the embossing. I love how it looks like I've stamped each word separately and it gives that stamp a different look. For the background I used some washi tape from Freckled Fawn,our collaboration for the month of April :-)

He utilizado la tecnica del "planchado" para crear el panel de cumpleaños. Embosé en transparente el Birthday Blackboard de Hero Arts, coloreé cada palabra en distintos colores con rotuladores (no permanentes), y utilizando una plancha caliente y un par de folios, derretí el embossing para quitarlo del papel. Me encanta como queda como si hubiera estampado cada palabra individualmente, y le da un look distinto a ese sello. Para el fondo he utilizado una washi de Freckled Fawn, que es nuestra colaboración para el mes de Abril :-)

Remember that there will be some prize packages from Hero Arts and Simon Says Stamp, so comment on each of the blogs in the hop to increase your chances. Thanks to our sponsors for that amazing giveaway! They are the best!
Time to continue the hop, and the next stop is Debby Hughes, with what I'm sure will be an amazing card, cause all her cards are just stunning!!
Thanks for stopping by!

Recuerda que se sortean 2 paquetes regalo de Hero Arts y Simon Says Stamp, asi que comenta en todos los blogs del salto para tener más oportunidades. Gracias a nuestros sponsors por este increible sorteo! Son de lo mejorcito!
Y ya te toca continuar con el salto, y tu siguiente parada es Debby Hughes, que te habrá preparado una tarjeta impresionante, porque todas sus tarjetas son espectaculares!!
Gracias por pasarte por aqui!


Supplies:

Here is the new collection... Aquí está la nueva colección

First day showing the new products from La Pareja Creativa at the blog, and here is my card:

Hoy empezamos a mostrar la nueva colección de La Pareja Creativa en el blog, y aqui esta mi tarjeta:
As soon as I saw the "En El Cielo" stamp set, I fell in love with that rainbow, so I couldn't wait to use it. The clouds are from the "En El Cielo" die set and the sentiment you can find it in "Sentimientos 1" and "Sentimientos 2". I used distress inks to color my sky and promarkers to color the rainbow. I wanted it to be sparkly, so I covered it with a wide double sided tape and covered it with glitter. Here is a close up:

En cuanto ví el set de sellos de "En El Cielo" me enamoré del arco íris, asi que tenía unas ganar de usarlo!!! Las nubes son del set de troqueles "En El Cielo" y el sentimiento lo puedes encontrar en el set "Sentimientos 1" y en el de "Sentimientos 2". 
Para crear el cielo he utilizado tintas distress y con el arco íris, promarkers. Quería que brillara, asi que lo cubrí con una cinta adhesiva ancha de doble cara y añadí purpurina. Aquí se puede ver mejor:
Go by the LPC blog and check out what the rest of the DT made for you, and don't forget about the giveaway!!!! (Yesterday we had a bit of a problem with the comment section on the blog, but it's fixed now, so go comment to win)

Pues pasaté por el blog de LPC y no te pierdas lo que han preparado las chicas del DT para tí, y no te olvides del sorteo!!! (Ayer tuvimos un problemilla con la sección de comentarios, pero ya está solucionado, asi que corre a comentar)
Thanks for stopping by and I'll be back later today with a special post for ABNH!

Gracias por pasarte por aqui y estaré de vuelta por aqui esta noche con un post especial para ABNH!

Supplies:

LinkWithin

Related Posts Plugin for WordPress, Blogger...